
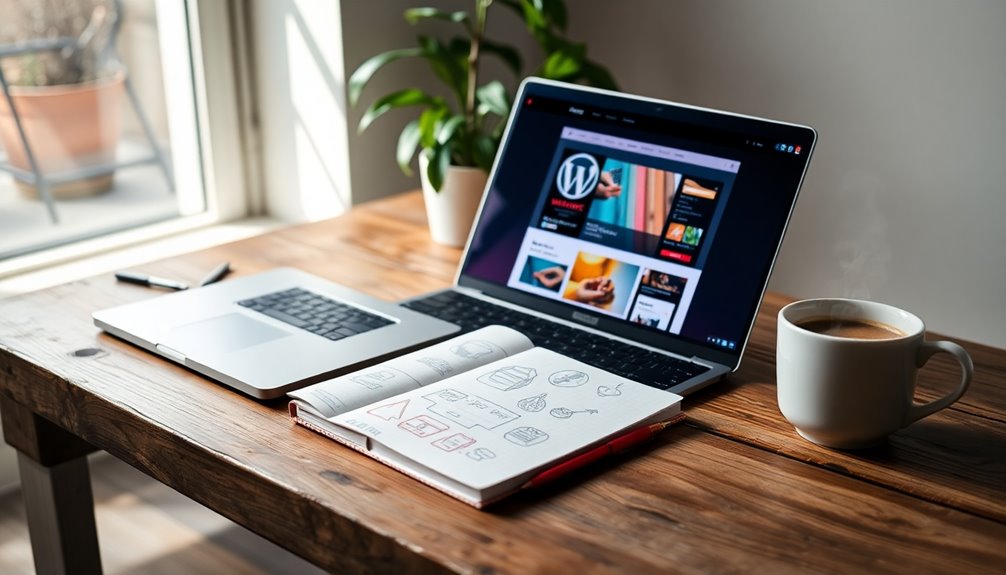
Switching your WordPress theme without losing content is straightforward. Start by backing up your site to secure all files and database information. Choose a compatible theme and test it on a staging site to prevent issues. Customize the new theme, checking that menus and widgets transfer correctly. After the change, review your content for consistency and functionality. If any problems arise, you can tackle them with ease. For more tips on a smooth shift, keep exploring!
Why You Might Consider Changing Your WordPress Theme
Changing your WordPress theme can breathe new life into your website, especially if you feel it’s starting to look outdated or doesn’t reflect your brand anymore.
Keeping up with design trends is essential for attracting and retaining visitors. A modern theme can enhance user experience, making your site easier to navigate.
Staying updated with design trends is crucial for engaging visitors and enhancing navigation on your website.
Consider how the new theme aligns with your brand identity and whether it supports mobile responsiveness. A well-chosen color palette and typography choices can greatly impact how users perceive your site.
Additionally, new themes often come with improved performance and accessibility features, ensuring all visitors can engage with your content. Embracing enhanced e-commerce functionality can elevate your website, making it more appealing and functional for everyone.
Preparing for the Theme Switch: Backing Up Your Site

Before diving into a new theme, safeguarding your content is essential. Start by using reliable backup plugins to create a complete backup of your site.
These plugins make it easy to save your files and database, ensuring you have everything you need for a smooth changeover. Regular backups not only protect your content but also facilitate quick site recovery if something goes wrong during the theme switch. Additionally, utilizing automatic backups ensures consistent protection against data loss.
Make sure you store your backups in a secure location, like cloud storage or an external drive, for added safety.
Once your site is backed up, you can confidently explore new themes, knowing your content is secure and ready for a fresh look.
How to Choose the Right WordPress Theme for Your Needs
Choosing the right WordPress theme starts with identifying your website goals.
Think about what you want to achieve and how flexible you need the design to be.
This clarity will help you find a theme that truly fits your needs. Additionally, consider themes with customizable features to ensure your site can grow and adapt over time.
Identify Your Website Goals
What do you want your website to achieve? Identifying your goals is essential for choosing the right WordPress theme.
Consider your target audience and how the theme will enhance their user experience. Make sure your content alignment supports branding consistency and resonates with visitors.
Think about conversion optimization; a well-designed theme can greatly boost your performance metrics. Aesthetic appeal matters, but don’t overlook functionality improvement and mobile responsiveness, especially as more users browse on mobile devices.
Also, consider future scalability—your theme should adapt as your site grows. By clarifying these goals, you’ll make informed decisions that not only meet your current needs but also pave the way for long-term success.
Consider Design Flexibility Options
Once you’ve identified your website goals, the next step is evaluating design flexibility options in your WordPress theme.
Look for themes that offer a range of layout variations to enhance user experience. Confirm the design aesthetics align with your branding, utilizing color schemes and typography choices that reflect your identity.
Responsive design is essential, as it guarantees your site looks great on all devices. Pay attention to visual hierarchy to guide visitors through your content effectively.
Consider accessibility considerations to make certain all users can navigate easily. Finally, check how well the theme supports image integration, as visuals are critical for engagement.
Choosing a flexible theme will empower you to adapt and grow your website seamlessly.
Understanding Theme Compatibility: Plugins and Customizations
When switching WordPress themes, understanding how your current plugins and customizations interact with the new design is essential. Different theme frameworks can affect how well your plugins function together, leading to potential plugin conflicts.
Switching WordPress themes requires careful consideration of plugin interactions and potential conflicts to ensure a seamless transition.
You’ll want to check the customization limits of your new theme to guarantee it meets your needs. Consider how responsive design impacts your site’s performance and user experience, especially on mobile devices.
Additionally, verify your new theme adheres to accessibility standards, making your content easy to navigate for all users. Pay attention to the visual hierarchy as it can greatly affect engagement.
Taking these factors into account will help you shift smoothly while maintaining the integrity of your site’s functionality. Since themes like Astra’s lightweight structure are known for better performance, it’s crucial to choose one that aligns with your site’s speed requirements.
Setting Up a Staging Site for Safe Testing
Before diving into your new theme, setting up a staging site can save you from potential headaches. A staging site allows you to test your theme without affecting your live website.
You’ll enjoy the staging benefits of experimenting with layout, design, and functionality in a secure environment. Plus, you can see a theme preview before making any final decisions. Many hosting providers offer easy one-click staging setups, making the process straightforward. Once you’re satisfied with how everything looks and works, you can push your changes to the live site confidently. Additionally, this approach helps ensure that your website remains functional while you make adjustments, allowing for a smooth transition to your new WordPress theme.
This way, you minimize risks and guarantee your content remains intact while moving to a fresh new look.
Installing Your New WordPress Theme Step-by-Step
Now that you’ve set up your staging site, it’s time to install your new WordPress theme. Follow these simple steps to guarantee a smooth installation and avoid common installation pitfalls:
- Download the Theme: Get the theme file, usually in a .zip format.
- Access Your Dashboard: Log into your WordPress admin area and navigate to “Appearance” > “Themes.”
- Upload the Theme: Click “Add New” and then “Upload Theme.” Choose the .zip file and hit “Install Now.”
- Activate Your Theme: Once installed, click “Activate” to make it live on your staging site.
Keep these theme installation tips in mind to streamline the process and ensure your content remains intact.
Happy theming!
How to Transfer Your Customizations to the New Theme
Transferring your customizations to the new theme is crucial for maintaining your site’s unique identity. Start by documenting your current customization techniques, such as CSS styles or widget placements.
Many themes support similar features, so check for theme compatibility before diving in. If you’ve used plugins for customizations, make sure they’re compatible with the new theme as well.
Next, manually apply your customizations to the new theme by adjusting settings in the WordPress Customizer. You can copy and paste CSS directly into the new theme’s custom CSS section. Additionally, consider using performance optimization techniques to ensure that your site runs smoothly with the new theme.
Manually transfer your customizations in the WordPress Customizer, easily adding your CSS to the new theme’s section.
Finally, review your site thoroughly to verify that all customizations are intact and functioning as expected. This careful approach helps you keep your site’s personality while enjoying the benefits of a fresh design.
Adjusting Your Site’s Settings After Switching Themes
After switching themes, you’ll want to customize your new options to match your vision. Don’t forget to update your menus and widgets, as they mightn’t transfer automatically. Finally, check your page layouts to guarantee everything looks just right. Additionally, consider the design flexibility that page builders offer, as this can help you achieve a more cohesive look across your site.
Customize Theme Options
Once you’ve switched your WordPress theme, customizing the theme options is essential for guaranteeing your site reflects your brand and meets your needs.
Focus on the following aspects to enhance your site’s user experience:
- Color Palette: Choose colors that align with your branding for design consistency.
- Typography Choices: Select fonts that improve readability and enhance aesthetics.
- Layout Variations: Experiment with different layouts to find what works best for your content.
- Accessibility Options: Make sure your site is easily navigable for all users, enhancing mobile responsiveness.
These adjustments will help you achieve a cohesive look that showcases your brand while incorporating feature enhancements for a superior user experience.
Update Menus and Widgets
Updating menus and widgets is an essential step in guaranteeing your site functions seamlessly after switching themes.
First, check your menu organization. With a new theme, your previous menu items mightn’t display as intended. Navigate to the Appearance > Menus section to adjust the structure and ensure that all links are working correctly.
Next, focus on widget placement. Different themes often have unique widget areas, so review your widgets under Appearance > Widgets.
Drag and drop your desired widgets into the new areas that align with the theme’s layout. Don’t forget to save your changes!
Check Page Layouts
With your menus and widgets organized, it’s time to check how your pages look with the new theme.
Start by reviewing the page layout options available in your theme settings. Here’s what to do:
- Inspect Each Page: Navigate through different pages to see how content displays.
- Adjust Layouts: Use the theme’s options to tweak layouts for better visual appeal.
- Test Responsiveness: Check how your site looks on various devices. A responsive design is vital for user experience.
- Review Plugins: Confirm any plugins you use fit well with the new layout.
This process helps guarantee your site not only looks great but functions seamlessly after the theme switch.
Ensuring Your Content Looks Great With the New Design
As you shift to a new WordPress theme, ensuring your content shines in the updated design is essential. First, review your content presentation. Check how your text, images, and videos look within the new theme. Adjust formatting as needed to maintain clarity and engagement.
Next, focus on design consistency. Make sure your headings, fonts, and colors align with the new theme’s style. This creates a cohesive look that enhances user experience.
Focus on design consistency by aligning headings, fonts, and colors with your new theme for a cohesive user experience.
Don’t forget to preview your posts and pages frequently during this process. This allows you to see how your content interacts with the new design in real-time. Additionally, consider implementing responsive design principles to ensure your site looks great across all devices.
Small tweaks can make a big difference, ensuring your content not only fits but thrives in its new environment.
Checking for Broken Links and Missing Media
After guaranteeing your content looks great with the new design, the next step involves checking for broken links and missing media. This is vital for maintaining a high-quality user experience.
Here’s how to tackle it:
- Run a link checker: Use a reliable tool to identify any broken links on your site.
- Conduct a media audit: Verify that all images and videos are displaying properly.
- Update or remove broken links: Fix any issues or replace them with relevant content.
- Test media files: Confirm all audio and video elements play correctly. Additionally, ensure that your database connection is stable to prevent any potential database connection issues.
Optimizing Your Site’s Performance Post-Switch
Once you’ve switched your WordPress theme, verifying your site runs smoothly is essential.
Start by implementing caching strategies to speed up loading times. Consider using plugins that handle browser caching and page caching effectively.
Next, focus on image optimization—compress your images before uploading to reduce load times without sacrificing quality. Use tools that automate this process for convenience.
Don’t forget performance monitoring; regularly check your site’s speed and responsiveness using tools like Google PageSpeed Insights.
Finally, review your server configuration to confirm it’s optimized for the new theme. This might involve adjusting settings or upgrading your hosting plan for better performance. Additionally, make sure to utilize caching tools to further enhance site speed and reduce server load.
How to Test Your Site’s Functionality With the New Theme?
After switching your WordPress theme, it’s essential to test your site’s functionality.
Start by checking your navigation menus to guarantee everything links correctly.
Then, test your page load speed to confirm that your site runs smoothly with the new design.
Check Navigation Menus
As you explore your new WordPress theme, checking the navigation menus is essential for guaranteeing a seamless user experience.
Proper theme navigation and menu organization can greatly impact how visitors interact with your site. Here’s what to look for:
- Check Links: Verify all menu items link to the correct pages.
- Review Structure: Confirm the hierarchy of your menus reflects your content organization.
- Test Responsiveness: View your menus on different devices to ensure they adapt well.
- Assess Visibility: Make sure your navigation is easy to find and use, enhancing user engagement.
Test Page Load Speed
Testing your site’s page load speed is crucial when switching to a new WordPress theme. Start by using reliable test tools like Google PageSpeed Insights or GTmetrix to measure your site’s performance metrics.
These tools provide valuable insights into your new theme’s impact on load times. After evaluating the initial speed, consider implementing load optimization techniques, such as compressing images or minifying CSS and JavaScript files.
You can also use speed plugins to enhance performance further. Remember, a fast-loading site improves user experience, encouraging visitors to stay longer.
Regularly testing your page load speed will help you maintain peak performance and guarantee your new theme meets your site’s needs.
Updating Your SEO Settings After Changing Themes
Once you’ve switched your WordPress theme, it’s crucial to review and update your SEO settings to maintain your site’s visibility.
Here’s what to focus on:
- Update Meta Tags: Verify your new theme supports effective meta tags for better keyword optimization.
- Check URL Structure: Make certain your permalinks are still optimized for search engines.
- Optimize Image Alt Text: Review your images and add alt text to improve accessibility and SEO.
- Refresh Sitemap and Analytics Tracking: Update your sitemap and confirm your analytics tracking is correctly set up to monitor page speed and mobile responsiveness.
What to Do If You Encounter Issues During the Switch?
Switching WordPress themes can sometimes lead to unexpected issues, and knowing how to tackle them is essential.
If you encounter problems, start with theme troubleshooting. Check for plugin conflicts by disabling them one by one; this can often reveal the culprit.
Next, verify your content integrity remains intact. Review pages and posts to confirm everything displays correctly.
If specific elements are misaligned, consider adjusting the theme settings or custom CSS.
Don’t forget to clear your cache and refresh your browser to see the latest changes.
If issues persist, consult the theme’s support forum or documentation for guidance.
Learning From the Experience: Documenting Your Theme Change
Documenting your theme change is essential for future reference and improvement. By keeping track of what you did, you can gather valuable experience insights that help you in future projects.
Here’s how to effectively document your theme change:
- Record Your Current Theme: Note the features and layout of your existing theme.
- Detail the New Theme: Document the new theme’s advantages and any customizations you plan.
- Track Changes: Keep a log of adjustments made during the switch, including plugins and settings.
- Evaluate Post-Change: After implementation, review how the new theme affects your site’s performance and user experience.
This theme documentation won’t only aid in troubleshooting but also improve your overall site management skills.
Conclusion
Switching your WordPress theme doesn’t have to feel like defusing a bomb! With a little preparation and the right steps, you can transform your site without losing a single precious word of content. Imagine revealing a stunning new look while everything you’ve built remains intact! So, roll up your sleeves, follow the guide, and watch your website flourish like a garden in spring. You’ve got this—your site’s makeover is just a few clicks away!