
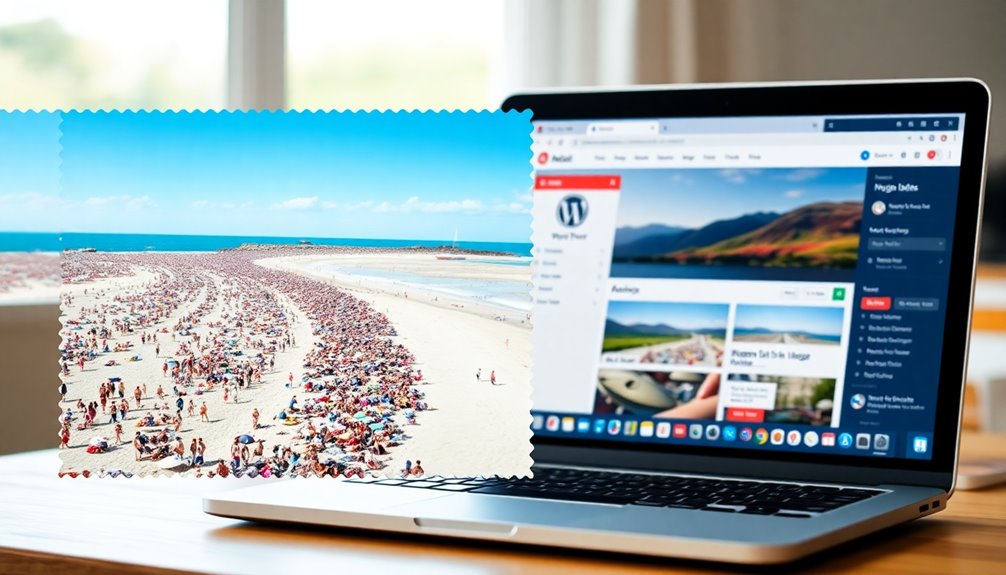
Resizing media before uploading to WordPress is essential for several reasons. It markedly boosts your site's loading speed, which enhances user experience and keeps visitors engaged. Large images can slow down your site, leading to higher bounce rates. By compressing images to around 150KB or less, you conserve server resources and improve SEO performance as search engines favor faster sites. Additionally, properly sized images prevent distortion across devices, presenting a professional appearance. If you want to explore the best practices for media optimization, you might find some valuable tips ahead.
Importance of Media Resizing
When you resize media before uploading it to WordPress, you're not just saving space; you're also enhancing your site's performance. Resizing images helps maintain ideal loading speed, which is vital since users often abandon sites that take longer than three seconds to load. Regular backups serve as a critical protection mechanism against unexpected incidents that can also affect media files. Implementing a solid backup strategy is essential for data security and can safeguard your resized media assets.
High-resolution images can exceed 1MB, overwhelming server resources and impacting web performance. By compressing images to around 150KB and guaranteeing they fit recommended dimensions—like 1200 x 630 pixels—you can prevent visual distortion and improve image quality. This proactive approach not only reduces unnecessary duplicates generated by WordPress but also boosts your SEO performance through faster load times. Prioritizing media resizing guarantees a better user experience and keeps your audience engaged. Additionally, optimizing images for site speed and performance significantly contributes to overall search engine rankings.
Impact on Website Performance
Resizing your media can drastically improve your website's loading speed, which is essential for keeping visitors engaged. Additionally, testing website functionality before uploading media can help ensure that optimized images are displayed correctly across various devices. Faster load times not only enhance user experience but also boost your SEO performance, helping your site rank higher in search results. Furthermore, optimizing images before upload can significantly reduce server load during peak traffic times, ensuring a smoother browsing experience for users.
Loading Speed Optimization
Optimizing loading speed is essential for enhancing website performance, as even a slight delay can drive potential visitors away.
To achieve loading speed optimization, you need to reduce image size before uploading your WordPress images. Large, unoptimized images can slow down page load times considerably, increasing bounce rates. Aim for optimized images under 150KB to maintain a balance between quality and speed.
By compressing and resizing images, you guarantee faster loading times, which is critical for user retention. Additionally, using the right image dimensions tailored for different elements can minimize unnecessary bandwidth usage.
These steps won't only enhance your websites but also create a smoother browsing experience across all devices, helping you keep visitors engaged.
Improved SEO Performance
Image optimization not only boosts loading speed but also plays an essential role in enhancing your website's SEO performance.
By resizing images before uploading to WordPress, you can markedly reduce file sizes, ideally keeping them under 150KB. This reduction leads to faster-loading pages, which are favored by search engines.
Optimized images improve your Core Web Vitals metrics, particularly Largest Contentful Paint (LCP), a key factor in SEO rankings. Additionally, studies show that 40% of users abandon sites that take longer than three seconds to load, so better loading times can help lower your bounce rates.
With effective image compression, you'll not only enhance your site's visibility but also increase traffic, ultimately boosting your overall SEO performance.
Enhanced User Experience
When you take the time to resize media before uploading to WordPress, you greatly enhance the user experience and overall website performance.
By using image optimization plugins to reduce image size, you achieve faster loading speeds, which is essential since 67% of users abandon sites that take longer than 5 seconds to load.
Optimized images fit your design layout perfectly, ensuring no distortion or cropping, making your site visually appealing.
Additionally, smaller file sizes mean reduced server storage costs and less bandwidth usage, allowing your website to load faster, especially on mobile devices with slower connections.
Proper resizing practices also guarantee responsive images, further improving user experience across various devices.
Relationship Between Image Size and SEO
When you resize images for your WordPress site, you're not just improving aesthetics; you're also boosting your SEO. Properly optimized images can greatly enhance loading speed, which helps reduce bounce rates and keeps users engaged. Additionally, implementing a well-planned backup strategy for your site ensures that your optimized images are protected from data loss. This is crucial because SEO optimization plugins can further assist in managing image attributes, contributing to better search rankings. Regular backups also help maintain the integrity of your media files, especially since daily backups can prevent potential data loss from cyberattacks or system failures.
Loading Speed Impact
Optimizing media before uploading to WordPress is essential for maintaining fast loading speeds, which directly impacts your site's SEO performance.
By resizing images to keep file sizes below 150KB, you can greatly enhance loading speed. Large, unoptimized images slow down your site, leading to higher abandonment rates—most users leave if a site takes longer than three seconds to load.
This not only frustrates visitors but also harms your SEO performance, as search engines factor load speed into their rankings. Using optimized images improves core web crucial metrics like Largest Contentful Paint (LCP), ensuring your site that loads quickly retains visitors.
Ultimately, reducing image sizes is a straightforward way to boost both loading speed and your site's visibility in search results.
Bounce Rate Reduction
While you might focus on content quality, the size of your images plays a crucial role in shaping user experience and, ultimately, your site's bounce rate.
Large image files can slow down loading speed, leading to higher bounce rates as users abandon a site that takes too long to load.
Compressing images to an optimized size, ideally below 150KB, guarantees faster loading and improves your SEO performance.
Google values quick loading times, and a delay can reduce conversions by 7%.
When you use optimized images, you enhance user engagement, keeping visitors on your site longer.
Image Optimization Techniques
Image optimization is essential for maintaining a fast and efficient website, directly impacting your SEO performance.
By employing effective image optimization techniques, you can greatly reduce file sizes, ideally keeping them under 150KB. This reduction enhances loading speed, leading to better user experiences and lower bounce rates.
Choosing the right image format, like JPEG for photos and PNG for graphics, allows you to resize images without losing quality, further boosting site performance.
Optimized images fit your layout perfectly, preventing unnecessary large files that can slow down page load times.
Understanding WordPress Default Sizes
When you upload an image to WordPress, the platform automatically generates four default sizes: Thumbnail (150 x 150 pixels), Medium (up to 300 x 300 pixels), Large (up to 1024 x 1024 pixels), and Full Size (the original dimensions).
Understanding these default image sizes helps you:
- Optimize loading speed by using appropriately sized images for various parts of your site.
- Improve site performance by preventing WordPress from generating multiple copies of the same image. Additionally, a well-structured database can enhance data retrieval efficiency when images are correctly sized before upload. Furthermore, using incremental backups can safeguard your media files against accidental loss during uploads.
- Reduce unnecessary file generation by resizing media before uploading.
Additionally, being aware of the maximum upload capacity can help ensure that your images do not exceed the limits set by your hosting provider.
Recommended Image Sizes for Different Uses

Choosing the right image sizes for different uses on your WordPress site can greatly enhance both aesthetics and functionality.
For header or banner images, aim for 1200 x 600 pixels to fit standard screens. High-quality media is essential for creating a captivating first impression, and using optimized images can significantly improve your site's loading speed.
Featured images for social sharing should be 1200 x 628 pixels, while blog post images work best at 1200 x 630 pixels.
When it comes to product images, use 800 x 800 pixels for the main display, with catalog thumbnails at 300 x 300 pixels for maximum visibility.
For your background images, stick to dimensions of 1920 x 1080 pixels, keeping the file size under 500 KB to improve loading speed.
These recommended image sizes guarantee your content looks professional and performs well. Additionally, using a lightweight design can further enhance your site's loading speed and overall performance.
Image Compression Techniques
Effective image compression techniques are essential for enhancing your WordPress site. By utilizing these methods, you can achieve smaller file sizes that improve loading speed and user experience.
Here are three effective techniques you should consider:
- Lossy Compression: This technique discards some image data, making it suitable for photographs while achieving significant size reduction.
- Lossless Compression: Ideal for graphics like logos, this method retains original quality but still helps enhance images.
- WebP Format: Offering superior compression, WebP images can be 25-35% smaller than JPEG or PNG without losing quality.
Using tools like TinyPNG or plugins like ShortPixel in your WordPress media library can streamline the process and keep your site running smoothly.
Regular audits further help maintain peak performance.
Best Practices for Image Optimization

Optimizing images for your WordPress site is essential for maintaining fast loading speeds and a seamless user experience.
Start by resizing your images; aim for recommended image dimensions of at least 1200 pixels on the longest side. This helps avoid excessive file sizes that can slow down your site.
When compressing images, target a file size of 150KB or below to balance quality and efficiency.
Choosing the appropriate image format is also vital—use JPEG for photos and PNG for graphics to enhance both visual quality and file size.
Finally, regularly audit and optimize your media files post-upload to prevent accumulation of unoptimized images, ensuring your site remains fast and responsive over time.
Utilizing Plugins for Image Management
When managing images on your WordPress site, using popular image optimization plugins can make a big difference.
These tools automate the resizing and compression processes, saving you time while enhancing your site's performance.
Let's explore the benefits of automation and the different types of compression these plugins offer.
Popular Image Optimization Plugins
Managing images on a WordPress site can be a challenging task, especially with the need to balance quality and performance.
Fortunately, image optimization plugins can simplify this process. Here are three popular options:
- WP Smush: Automates image compression during upload, ensuring your images are web-ready without any effort on your part.
- ShortPixel: Offers automatic image compression and supports various formats, including converting images to WebP for better efficiency.
- EWWW Image Optimizer: Provides bulk optimization features, allowing you to compress and resize existing images in your media library.
Plugins like Imsanity also help by automatically resizing large images to fit your site's layout, preventing excessive file sizes while maintaining consistent quality.
Benefits of Automation
Automating your image management with plugins like WP Smush or ShortPixel not only saves you time but also guarantees your images maintain consistent quality.
These image optimization plugins help you compress and resize images during uploads, greatly reducing manual effort. By using bulk optimization features, you can easily enhance your entire media library, which is essential for maintaining site speed.
Additionally, many plugins offer lazy loading, making certain images load only when visible, further boosting web performance. Automation prevents the accumulation of unoptimized images that could slow down your site over time.
Regular updates from these plugins make certain they adapt to the latest best practices, allowing you to focus on your content while they handle the heavy lifting of image management.
Compression Types Explained
Understanding the different types of image compression is vital for optimizing your WordPress site effectively. Here's a quick breakdown:
- Lossy Compression: This method reduces file size by discarding some image data, making it great for photos. Tools like TinyPNG and ShortPixel automate this process in WordPress.
- Lossless Compression: Retaining all original data, this is perfect for high-detail graphics like logos. You can use plugins like EWWW Image Optimizer for this.
- WebP Format: Offering superior compression, WebP typically reduces file sizes by 25-35% compared to JPEG and PNG without sacrificing image quality.
Utilizing automated optimization plugins can streamline your process, while regular audits and bulk optimization guarantee efficient storage management and consistent image quality.
Customizing Image Sizes in WordPress
When you customize image sizes in WordPress, you not only enhance your site's visual appeal but also improve its loading speed and overall performance.
By adjusting the default image sizes in the WordPress dashboard under Settings > Media, you can tailor dimensions that better fit your design needs. This helps optimize images, ensuring they aren't larger than necessary for their display areas.
Remember, new custom image sizes will only apply to images you upload after making changes. For existing images, you'll need to regenerate thumbnails to update their dimensions.
If you need even more flexibility, you can create additional custom image sizes using the 'add_image_size()' function in your functions.php file.
Pre-upload Optimization Methods
Customizing image sizes in WordPress is just one part of optimizing your media for better performance.
Pre-upload optimization is essential for guaranteeing your images load quickly and maintain quality. Here are three effective methods you can use:
- Resize Images: Adjust dimensions to fit your layout, like 1200 x 630 pixels for blog posts, before uploading them to WordPress.
- Compression: Use tools like Adobe Photoshop or online compressors to reduce file sizes without sacrificing image quality. Aim for under 150KB!
- Check Compression Level: Verify the compression level strikes a balance between maintaining your original size and reducing bandwidth usage.
Monitoring and Auditing Media Files

To maintain an efficient and high-performing WordPress site, regularly monitoring and auditing your media files is essential.
Start by identifying unused or redundant images to free up storage space and enhance website performance. By keeping an eye on image sizes and formats, you can guarantee all uploaded media is optimized, balancing visual quality and loading speed.
Tracking image dimensions helps maintain design integrity, preventing layout issues. Utilize plugins that offer media management features to automate the auditing process, allowing for bulk optimization and easier oversight of your image assets.
Conduct periodic reviews of your media library to spot further optimization opportunities, like converting larger files to more efficient formats such as WebP. This proactive approach keeps your site running smoothly.
Enhancing User Experience Through Optimization
Optimizing your media files not only boosts loading speeds but also enhances the overall user experience on your WordPress site.
By resizing images before uploading, you can guarantee that:
- File sizes remain manageable: Keep images below 150KB to improve loading speeds and reduce bounce rates.
- Visual clarity is maintained: Properly resized images fit seamlessly, avoiding visual distortion and keeping your site looking professional.
- SEO performance thrives: Optimized images lead to faster page loads, which Google favors, boosting your visibility in search results.
Conclusion
In a world where first impressions matter, resizing your media before uploading to WordPress is your golden ticket to a faster, more efficient site. Just like a well-tailored suit, optimized images fit perfectly, enhancing performance and boosting SEO. By taking these simple steps, you're not just improving load times; you're also elevating the user experience, ensuring visitors stick around and engage. So, don't let oversized images weigh you down—trim the fat and watch your site thrive!